How to Install Gutter Guards: A Step-by-Step Guide
 Revised by Bruce Hulse
Keep Your Eavestroughs Clear and Your Home Protected
Gutter guards are a practical solution for homeowners looking to reduce eavestrough maintenance and prevent common drainage problems. When installed correctly, they act as a protective barrier against leaves, twigs, and roof debris, helping to maintain consistent water flow and minimize the risk of clogs. This is especially important in a climate like Ottawa’s, where fluctuating weather and seasonal debris can quickly lead to blockages, ice dams, or overflow that damages your home’s structure. Installing gutter guards is an effective way to preserve your gutter system and extend its lifespan—and while it’s possible to do it yourself, proper planning and safe installation are key.
Tools and Materials Required
Before you begin, gather all tools and materials to ensure a smooth installation process. Being prepared not only saves time but also reduces safety risks while working at height. Most tools are common household items, though a few may vary depending on the type of guard you plan to install.
You’ll need:
-
Ladder – Use a sturdy, appropriately sized ladder for reaching your gutters safely.
-
Tape measure – Essential for accurately calculating the length of gutters to cover.
-
Screwdriver or drill – Required for fastening certain types of gutter guards.
-
Hammer – May be needed depending on the attachment method.
-
Gutter guards – Choose the style that suits your home: brush, foam, micro-mesh, or surface tension.
-
Gutter-cleaning tools – Includes a scoop, gloves, and possibly a gutter brush to clear debris.
-
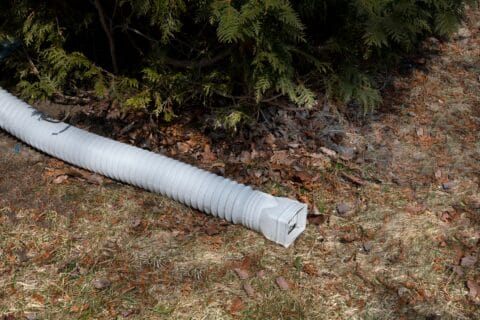
Hose – Needed for flushing out the system before installation and testing it afterward.
-
Bucket and S-hook – Hang the bucket from the ladder using the S-hook for efficient debris disposal.
-
Handsaw or circular saw – Useful for cutting gutter guard sections to the proper length.
Having all of these tools on hand will help streamline the process and ensure you’re not improvising mid-installation.
Step 1: Clean and Inspect the Gutters
The first and most crucial step before installing any guard system is to thoroughly clean your gutters. Debris left in place can interfere with guard placement, allow water to pool, or even lead to rot and insect infestations beneath the guard surface. Clean gutters provide a smooth, stable base for any installation.
Start by manually removing large debris like leaves, twigs, and roof granules using gloves and a scoop. Be thorough along the entire length of the eavestroughs, especially near the downspouts. Once the bulk is cleared, use a hose to flush out smaller particles and check that water drains properly through all downspouts.
After cleaning, inspect your gutters for:
-
Loose or rusted brackets
-
Cracks or holes in the gutter base
-
Sagging or disconnected joints
-
Existing signs of water overflow or damage
Addressing these issues before installing gutter guards is essential. If left unattended, they could compromise the guard’s performance and lead to larger repairs down the road.
Step 2: Measure and Prepare Your Materials
Next, it’s time to measure your gutter system and plan your installation. Measuring ensures you purchase enough material and cut your guards to the correct dimensions. It also helps you anticipate any tricky areas around corners, slopes, or uniquely shaped sections of roofline.
Steps to follow:
-
Measure the full length of each gutter section, including around corners and near the downspouts.
-
Add approximately 10% to your total length to account for overlap, trimming waste, or future adjustments.
-
Review the installation manual for the specific type of gutter guard you’ve selected. Not all systems install the same way—some require overlapping panels, while others snap directly into place.
-
Pre-cut the guard sections using a handsaw or circular saw as needed, especially for corners or tight spaces.
This planning phase helps reduce frustration during installation and ensures a more seamless, professional finish.
Step 3: Install the Gutter Guards
Different gutter guard types require different installation methods, so it’s important to follow the guidelines specific to the product you’ve chosen. Below are some common styles and how to install them effectively.
Brush and Foam Gutter Guards
These are among the easiest types to install and are great for a quick, tool-free upgrade. Simply insert the guard sections into the gutter channel, ensuring they fit snugly without large gaps. Make sure they sit evenly across the length of the gutter to prevent debris from slipping underneath. This type works best for homes with minimal leaf drop or pine needles.
Micro-Mesh Gutter Guards
For homeowners looking for higher filtration, micro-mesh guards are ideal. These fine screens block even small debris like shingle grit and pollen. Installation usually involves snapping the mesh onto the outer edge of the gutter or securing it with screws. It’s important to align each panel precisely and double-check that no openings are left where debris could sneak through.
Surface Tension Gutter Guards (Reverse Curve)
These require the most effort and attention to detail. Surface tension guards rely on the curved edge to direct rainwater into the gutter while debris slides off the roof. Installing them typically involves lifting the first row of shingles and securing the guard underneath, followed by fastening it to the front lip of the gutter. These systems must be pitched properly to function correctly, and errors in alignment can lead to water overshooting the gutter entirely.
For advanced systems, many homeowners choose to hire professionals to ensure installation meets manufacturer specifications and performs correctly under heavy rain.
Step 4: Inspect and Test the System
Once installation is complete, perform a careful inspection of every section of your gutter guards. Look for loose connections, visible gaps, or panels that are not properly aligned with the gutter lip. Pay special attention to corners and transition points where debris might bypass the guard.
After the visual check, use your garden hose to simulate rainfall. Start from the top of the roof and let water naturally flow into the gutter system. Watch how the water interacts with the guard:
-
Does it enter the gutter smoothly?
-
Are there signs of overflow or runoff?
-
Are any sections lifting or moving under water pressure?
If you notice poor performance, adjust the angle or fasten the panels more securely. A proper installation will ensure your gutters remain functional without routine cleaning, even through Ottawa’s heaviest weather.
Safety Tips During Installation
Safety is critical when working at height, especially around rooftops and ladders. Many homeowners underestimate the risk involved in even simple maintenance tasks like cleaning or guard installation.
Always follow these guidelines:
-
Use a stable ladder with rubber feet and make sure it’s positioned on level ground.
-
Never work alone—have someone nearby in case of an emergency.
-
Avoid reaching too far; move the ladder frequently instead.
-
Wear gloves to protect your hands from sharp debris or jagged metal edges.
-
Use safety glasses to protect your eyes from falling dirt or insects.
-
Do not work in rain, snow, or high wind.
While DIY is manageable for many homeowners, some properties may require specialized equipment or training. In those cases, it’s wise to consider hiring a professional to reduce your risk and ensure the job is done right.
DIY or Hire a Professional?
Installing basic gutter guards can be done safely and effectively by confident homeowners. However, if your gutters are high, your roof is steep, or you’re using more complex guard systems, it might be safer—and more effective—to call in a professional. A trained technician will have the experience to recognize underlying issues, recommend the right type of guard, and install the product to manufacturer standards.
If you’re unsure whether DIY installation is right for your home, reach out for a consultation. In some cases, a poor install can cost more in repairs than hiring a professional from the start. When done correctly, gutter guards reduce long-term maintenance and help keep your drainage system working through every season.
Conclusion
Installing gutter guards is a smart investment in your home’s longevity and protection. By preventing clogs, reducing maintenance, and supporting proper water flow, you’ll avoid many common issues like overflowing gutters, damaged fascia, and foundation erosion. Whether you opt for a simple insert or a more complex filtration system, preparation, safety, and precision are key to a successful installation.
For those who prefer peace of mind over ladders and tools, a professional service can make all the difference. Clear Ottawa offers reliable gutter guard solutions and eavestrough maintenance to help homeowners stay ahead of seasonal debris and weather damage.
Bruce Adam Hulse

Bruce Adam Hulse is the passionate and driven CEO of Clear Ottawa Windows, a leading exterior cleaning and gutter maintenance company serving residential and commercial clients throughout the Ottawa region.
Learning how to clean downspouts is essential due to extreme seasonal shifts, from deep winter freezes to rapid spring thaws and heavy summer rains.…
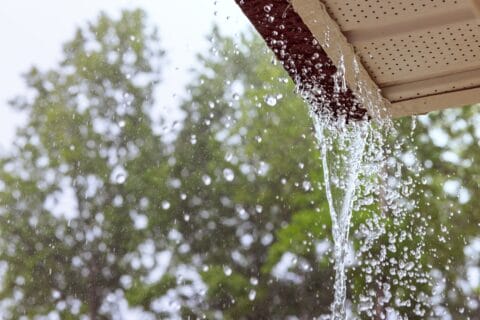
Gutter overflow during heavy rain is one of the most visible signs of drainage failure. When eavestroughs can’t handle runoff, water spills over…
