Essential Steps to Prepare Your Home for Gutter Installation
 Revised by Bruce Hulse
Properly installed gutters are crucial to protecting your home from water damage, foundation erosion, roof deterioration, and landscape issues. While gutter installation itself is vital, preparing your home beforehand is equally important to ensure a smooth installation process and long-lasting results. Proper preparation enhances the effectiveness of your gutters, ensures compliance with local codes, and significantly extends gutter lifespan. This comprehensive guide provides homeowners with clear, practical steps to effectively prepare for gutter installation, avoiding common pitfalls and guaranteeing successful results.
Why Preparation for Gutter Installation Matters
Preparing your home adequately before gutter installation has numerous benefits:
-
Installation Efficiency: Thorough preparation reduces installation time, minimizes disruptions, and ensures a seamless process.
-
Extended Gutter Lifespan: Addressing structural concerns beforehand provides a stable foundation for new gutters, significantly enhancing durability.
-
Protection Against Water Damage: Proper preparation helps gutters effectively channel water away from your home, preventing structural damage, mold, and mildew.
Neglecting these preparatory steps often leads to costly future repairs and recurring maintenance issues. To avoid these pitfalls, it’s important to understand and prevent common gutter installation mistakes—a proactive approach that protects your investment long-term.
Essential Steps to Prepare Your Home for Gutter Installation
Step 1: Inspect and Repair Soffits and Fascia
The soffits and fascia boards on your home provide structural support for your gutter system. Before installing new gutters, thoroughly inspect these areas for signs of wear or damage, including:
-
Water damage and rot: Look for discolored or warped wood, as these often indicate moisture intrusion.
-
Mold and mildew: Check for dark spots or visible growth, particularly in damp climates.
-
Cracks or structural weaknesses: Examine closely for any cracking or loosening boards.
If you notice these issues, address them immediately by replacing damaged wood, treating areas with a mold inhibitor, and ensuring structural integrity. Painting or capping the fascia with aluminum after repairs significantly increases resistance to future moisture damage.
Step 2: Address Existing Mold and Mildew
Mold and mildew growth around your roofline indicate persistent moisture issues, potentially leading to extensive structural damage if left unaddressed. Before gutter installation:
-
Clean thoroughly: Use appropriate mold-removal products to eliminate mold and mildew from soffits, fascia, and surrounding areas.
-
Apply mold inhibitors: After cleaning, apply mold-resistant treatments to affected areas, providing lasting protection and preventing recurrence.
Proper mold remediation ensures a safe, structurally sound base for your new gutters and prevents potential health risks from mold exposure.
Step 3: Paint Your House Before Gutter Installation
Painting your home prior to gutter installation is highly recommended. This step has several advantages:
-
Protecting Wood Surfaces: Painting seals exposed wood surfaces, significantly reducing moisture intrusion risks and preventing wood rot.
-
Cohesive Appearance: Painting before installation ensures a seamless, polished look, as gutters are installed over freshly painted, protected surfaces.
-
Reduced Maintenance: Painted surfaces require less frequent maintenance and protect against premature gutter corrosion or staining.
To ensure optimal performance and a finished look, consider painting your rain gutters before installation—this step helps protect materials and enhances curb appeal over time.
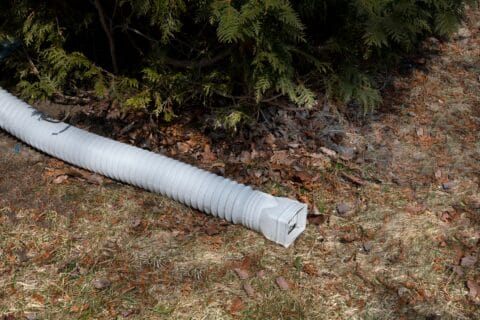
Step 4: Design an Effective Drainage System
Proper drainage is a cornerstone of effective gutter installation. To protect your home’s foundation, driveway, and landscaping:
-
Plan downspout placement carefully: Ensure downspouts direct water at least 4–6 feet away from your foundation to avoid pooling and soil erosion.
-
Avoid Critical Areas: Never install downspouts above gas meters, electrical boxes, or areas prone to ice formation to avoid safety hazards and potential damage.
-
Consider professional drainage solutions: Consult professionals about integrating downspout extensions, splash blocks, French drains, or underground drainage systems to efficiently divert water safely away from your home.
Proper drainage planning prevents costly foundation damage, basement flooding, and landscape erosion.
Creating a Safe and Efficient Installation Environment
Step 5: Clear the Installation Area
Prior to the arrival of gutter installation professionals, clear all outdoor spaces near your home to provide ample working space:
-
Remove outdoor furniture and obstacles: Move garden furniture, toys, grills, and other obstacles away from the house perimeter.
-
Relocate vehicles: Ensure cars and other vehicles are parked at least 20 feet from your home, providing installers with safe, unobstructed access for ladders and equipment.
A clear workspace minimizes accidents, protects your property, and speeds up the installation process.
Step 6: Keep Children and Pets Indoors
During installation, it’s crucial to keep children and pets safely indoors:
-
Prevent accidents: Installation areas often involve ladders, tools, and heavy equipment, posing potential safety hazards.
-
Reduce distractions: Keeping family members and pets indoors minimizes distractions for workers, ensuring focused and efficient installation.
Clearly communicate this safety rule with family members ahead of installation day.
Step 7: Trim Overhanging Tree Branches
Tree branches close to your roofline interfere with gutter installation and cause future debris accumulation, leading to frequent clogs and maintenance issues. Trim these branches beforehand:
-
Clear access for installers: Removing interfering branches allows installation teams easier, safer access to roof edges.
-
Prevent gutter damage: Regular trimming helps reduce debris, extending gutter lifespan and minimizing clogs or blockages.
Hire professional tree-trimming services for high or challenging branches to ensure safety and thoroughness.
Step 8: Remove Pest Nests and Check for Infestations
Inspect your roofline for pest nests, such as birds, squirrels, or insects, and remove these beforehand:
-
Avoid delays: Removing nests ahead of time prevents installation interruptions or delays.
-
Protect new gutters: Eliminating pests reduces potential damage to new gutters from nesting behaviors or droppings.
For significant infestations, consider professional pest control services to thoroughly resolve the issue before installation day.
Step 9: Close All Windows Near Installation Areas
Ensure windows around the installation area remain tightly closed during gutter installation:
-
Prevent debris intrusion: Closed windows block dust, dirt, and debris from entering your home during the installation process.
-
Avoid water damage: Closed windows prevent accidental water intrusion during gutter testing or rain showers during installation.
Double-check window closures on installation day for added home protection.
Step 10: Provide Easy Access to Exterior Water Sources
Gutter installers typically test new gutter systems immediately after installation to verify proper function:
-
Ensure water supply availability: Confirm your outdoor water spigots or garden hoses are accessible, functioning correctly, and easily reachable.
-
Facilitate quick testing: Readily available water ensures installers can quickly confirm proper gutter performance, identifying potential adjustments immediately.
Compliance and Professional Collaboration for Successful Installation
Step 11: Verify Local Building Codes and Compliance
Gutter installation projects often require compliance with local building codes, ensuring safe, standardized practices:
-
Consult professionals: Reputable gutter installation companies are familiar with local Ontario building codes, advising you on compliant gutter placements, materials, and drainage strategies.
-
Avoid costly violations: Compliance ensures your installation meets local safety regulations, avoiding potential fines, penalties, or costly future alterations.
Step 12: Hire Experienced Gutter Installation Professionals
Selecting professional gutter installers guarantees quality results, optimal gutter performance, and long-term home protection:
-
Evaluate credentials: Choose licensed, insured, reputable gutter installation specialists with proven experience and positive customer reviews.
-
Request references: Obtain previous client references and portfolio examples of completed gutter projects to confirm expertise and reliability.
Step 13: Communicate Clearly With Installation Teams
Maintaining clear communication with your installation professionals ensures your specific concerns or requests are addressed:
-
Discuss expectations clearly: Convey any special requests, aesthetic preferences, or specific drainage concerns before installation begins.
-
Maintain open dialogue: Encourage questions and provide easy contact during the installation process to address unexpected issues promptly and effectively.
Scheduling a Professional Consultation for Optimal Results
What to Expect During Your Consultation
Professional gutter installation consultations typically involve:
-
Home assessment: Professionals inspect your home’s roofline, fascia, and existing gutter system.
-
Customized recommendations: Experts recommend suitable gutter types, materials, sizes, and drainage systems tailored to your specific needs and local climate conditions.
-
Detailed planning: Installation timelines, preparation steps, and project costs are clearly communicated, aligning expectations and ensuring a smooth, timely installation process.
Conclusion: The Importance of Preparing Your Home for Gutter Installation
Careful preparation for gutter installation significantly impacts the overall success, longevity, and effectiveness of your gutter system. By inspecting your home’s structural elements, addressing potential issues proactively, creating a safe installation environment, and collaborating with professional gutter installers, homeowners can ensure their gutter investment effectively protects their homes for years.
Clear Ottawa offers professional inspections, expert guidance, and quality gutter installation services to support homeowners at every step. Proper preparation today guarantees durable, efficient gutter performance tomorrow, safeguarding your home and providing peace of mind for years to come.
Bruce Adam Hulse

Bruce Adam Hulse is the passionate and driven CEO of Clear Ottawa Windows, a leading exterior cleaning and gutter maintenance company serving residential and commercial clients throughout the Ottawa region.
Learning how to clean downspouts is essential due to extreme seasonal shifts, from deep winter freezes to rapid spring thaws and heavy summer rains.…

Gutter overflow during heavy rain is one of the most visible signs of drainage failure. When eavestroughs can’t handle runoff, water spills over…
